 2026-08-13
When it comes to LED wall installation, one size does not fit all. The video wall install method you choose for mounting your LED display will affect everything from structural safety and visual quality to maintenance access and long-term reliability.
Whether you are installing a massive outdoor billboard, a curved stage backdrop for a concert, or a fine-pitch indoor display for a corporate lobby, selecting the right LED display installation approach is the foundation of a successful project.
Every LED video wall installation has its own advantages. Understanding the differences between them is the first step toward making the right choice for your projects.
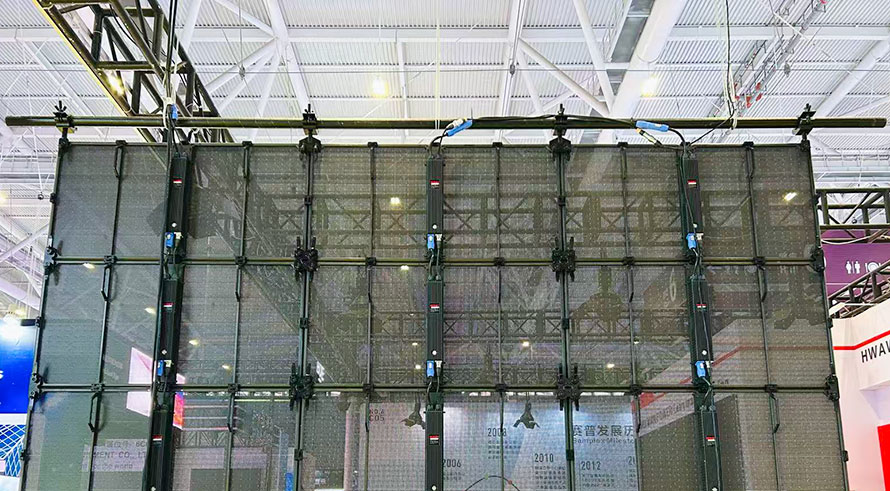
A hanging video walls installation is also called suspended installation or flying installation. It involves mounting the LED display from overhead structural supports including steel truss, rigging points and building beams.
Key Characteristics of hanging LED video wall installation:
The screen hangs in the air, with no floor contact;
Requires overhead structural support capable of bearing the total weight of the display;
Common in concert stages, arenas, and temporary event spaces;
Allows for dramatic visual impact and maximizes floor space.
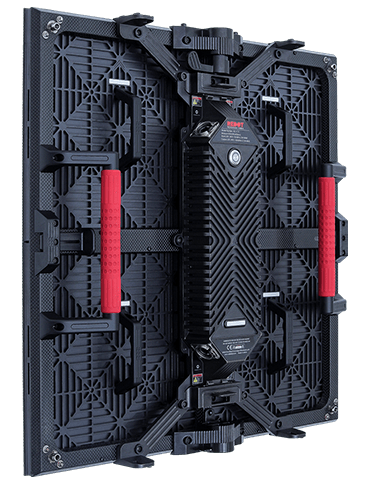
Here is an hanging LED video wall installing example of Redot RC-iLHolo3.9 at a trade show:
A stacking video walls installation is also known as floor-supported installation or ground-stacked LED screen installation. It involves assembling the LED video wall on a solid base that rests directly on the floor. The screen is typically built upward from the ground, with each cabinet stacked on top of the previous row.
Key Characteristics:
The entire weight of the display is supported by the floor;
Does not require overhead rigging points;
Easier and faster to LED video wall setup compared with flown LED video wall installations;
Can be combined with wheeled bases for mobility;
More accessible for maintenance and troubleshooting
A fixed installation is permanent, and some people also call it wall-mounted installation. This LED screen installation method involves permanently mounting the LED display onto a wall or structural framework. This is the most common approach for permanent or semi-permanent LED video wall installations.
Key Characteristics:
The display is securely bolted or clamped to a fixed structure;
Requires a perfectly flat and level mounting surface;
Often used with fine-pitch panels in indoor environments;
May be flush-mounted against the wall for a clean, integrated look;
In this LED wall setup guide, you will learn how to choose the right LED screen installation method depends on your specific project requirements.
Here is a quick decision-guide form for of video wall installing:
|
Installation Type |
Best For |
Key Advantages |
Key Considerations |
|
Hanging Installation |
1. Concerts and music festivals; 2. Arena sporting events; 3. Exhibition halls and trade shows |
1. Maximizes floor space; 2. dramatic visual impact; 3. flexible positioning |
1. Requires overhead rigging; 2. structural engineering; 3. professional rigging team |
|
Stacking Installation |
1. Outdoor festivals and events; 2. Trade show booths and exhibition stands; 3. Corporate event staging; 4. Houses of worship |
1. Fast setup; 2. no rigging required; 3. easy maintenance; 4. mobile options available |
1. Requires adequate floor space and load-bearing capacity |
|
Fixed Installation |
1. Retail store displays; 2. Corporate lobbies and boardrooms; 3. Broadcast studios and TV backdrops; 4. Control rooms and command centers; 5. Hotel and hospitality venues |
1. Clean appearance; 2. most stable; 3. integrated design; 4. minimal maintenance |
1. Requires structural wall assessment; 2. most challenging to reposition or relocate |
While each installation type has its specific nuances, the general LED wall setup process follows a consistent workflow:
3. Equipment Preparation
4. Structural Setup
5. Cabinet Assembly8. System Configuration and Commissioning
10. Handover and Training
Safety must always be the top priority during any LED display installation. Whether you are installing a small indoor screen or a massive outdoor video wall, following proper safety protocols is non-negotiable.
The rigging structure must support at least 5 times the total weight of the display;
Use only certified rigging hardware;
Have a qualified structural engineer sign off on the rigging plan;
Ensure the floor can support the total weight of the display;
Use leveling feet to distribute weight evenly;
Consider using a base frame or platform to spread the load;
Verify that the wall structure can support the display weight;
Use appropriate anchors;
A successful LED video wall installation requires careful planning, the right equipment, and unwavering attention to safety.
After reading this LED video wall installing guide, please remember:
1. Always choose the right installation method for your project;
2. Plan your power and data distribution before you arrive on site;
3. Always prioritize safety – structural integrity, electrical safety, fall protection, and personnel safety;
4. Test thoroughly before the event or handover;
5. Document everything such as configurations, calibration settings, and maintenance procedures