 2026-10-20
Building a seamless large LED panel wall is not just about connecting panels, it is about achieving perfect alignment. Even a millimeter of misalignment between cabinets can create visible seams, distorted images, and an unprofessional result.
To achieve a uniform and seamless large LED screen, you need precise panel alignment and positioning. A laser level for LED video wall installation is the most reliable tool for this job. It ensures that panels are perfectly aligned both horizontally and vertically, so content appears seamless across the entire LED screen wall.
Whether you are installing an indoor LED display wall for a corporate event or a large LED screen for an outdoor festival, laser levels are non-negotiable for professional results.
In the following content, we will show you how to use laser level for ground-supported LED wall building and some recommendations about highly praised laser levels in this industry.
Ground-supported installations are more common for rental, event, and temporary setups. A laser level and tripod make this process faster and more accurate.
Ensure the floor is level and stable. Use adjustable leveling feet on the base frame to compensate for minor floor irregularities.
Mount the laser level on a tripod and position it in front of the installation area. The tripod should be tall enough to project a line above the base frame.
Turn on the laser and project a horizontal line at the height of the first row of LED cabinets. This is your baseline for the LED panel wall installation.
Place the first row of cabinets along the horizontal line. Verify that each cabinet is level and that the bottom edges align with the laser beam.
Use the laser’s vertical line to check that cabinets are stacked directly above one another. Any drift will create a visible seam.
Continue stacking rows upward, checking against the laser line after each row. For tall screens, you may need to raise the laser level to maintain a visible reference line.
Before final locking and calibration, walk to both ends of the screen and verify that the entire LED display screen wall is level and square.
Selecting the right laser level and tripod is critical for improving work efficiency. You need a tool that is accurate, durable and easy to read in different lighting conditions.
Accuracy: ±1mm or better across the working range;
Range: At least 30 meters for large screens;
Self-leveling: Automatic leveling saves time and improves accuracy;
Visibility: Green beams are more visible than red, especially in bright environments; Always choose the green beam laser level if possible;
Tripod compatibility: Ensure the level mounts securely to a stable tripod;
Many experienced LED technicians recommend investing in a high-quality laser level from a reputable surveying instrument brand. While specific brand preferences vary, the consensus is clear: do not compromise on precision. A reliable laser level pays for itself in time savings and installation quality over dozens of projects.
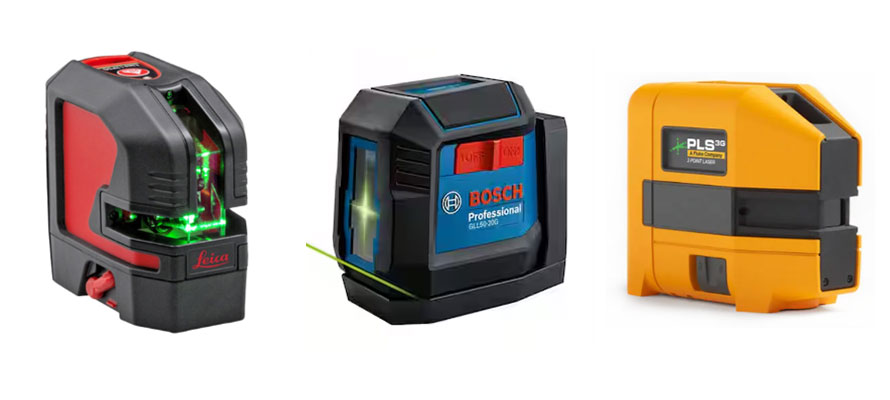
Here are 3 laser levels that have good reputation in LED video wall building industry: Leica, Bosch and Fluke. They are the LED wall install tools that makes everything easier!
Laser levels are a useful tool for all the technicians building an LED panel wall, whether you are installing a flown outdoor LED video wall, a ground-supported rental screen, or a permanent indoor LED display wall. They ensure precision, save time, and guarantee a professional and seamless result.
Follow Redot website news and get more useful information about LED display industry.